Creating a New Project
Getting Things Started
Now that OpenRefine is up and running—and we’ve got our dataset ready—it’s time to create a new project and start exploring what this powerful tool can do.
When you launch OpenRefine by clicking the diamond logo or accessing http://127.0.0.1:3333 you’ll presented with a home screen with some options, among which to start a new project. Let’s explore some of these options together before proceeding:
Have you noticed the Preferences link in the lower-left corner? If you click on it, you can adjust settings that apply to all projects. Since we’ll be working with a dataset containing over 25,000 rows, let’s make sure a few things will be properly displayed and change the parameter key ui.browsing.listFacet.limit to 30,000.
For more info about system preferences: https://openrefine.org/docs/manual/running#preferences
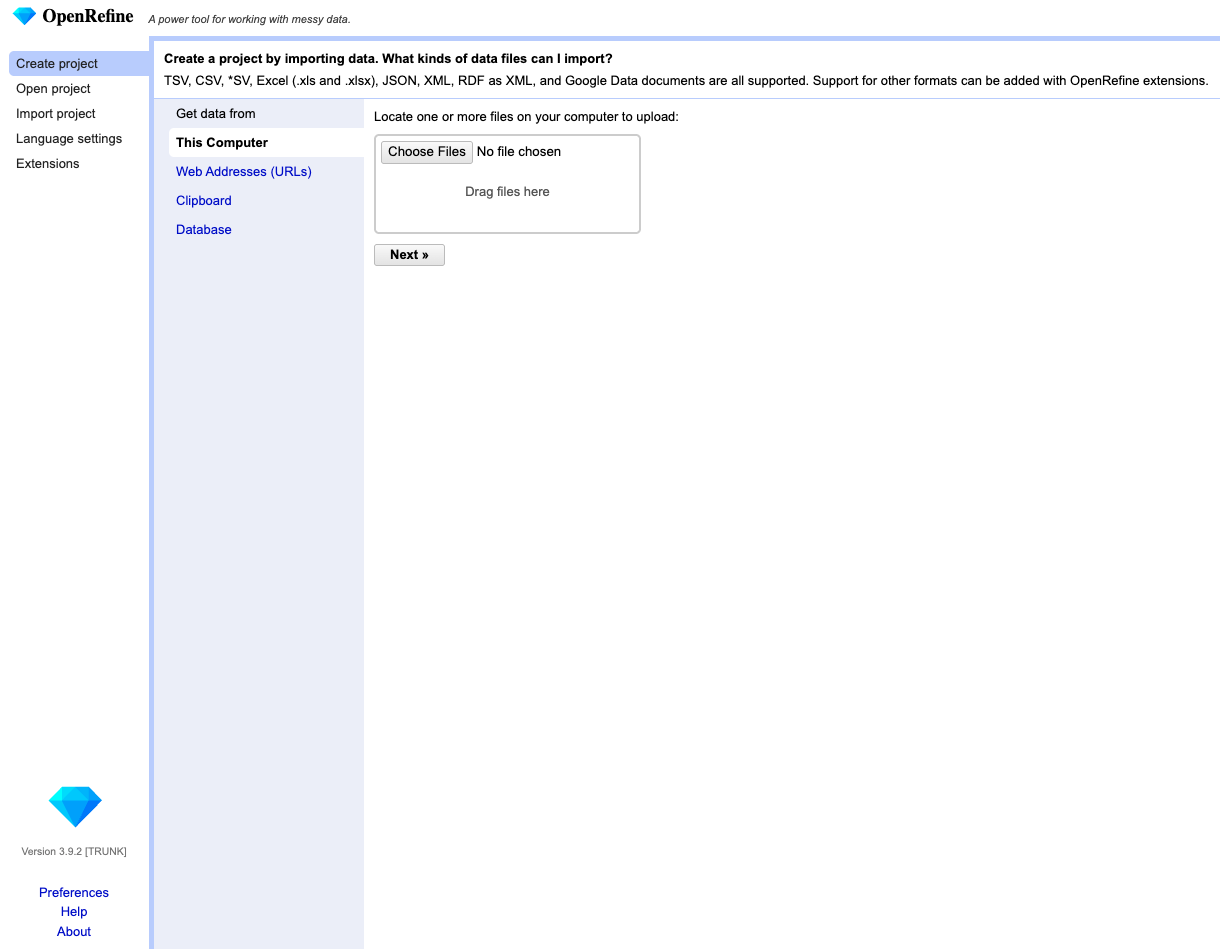
Alright, back to creating a project, OpenRefine allows users to choose files from a local machine by uploading XLS/XLSX, CSV, TSV, TXT, XML, JSON files and more, fetch data directly from a website such as Electric Vehicle Population Data from Data.gov, connect it with a database through login and authentication, or paste data directly from clipboard.
We will be using the first option and select the example dataset. This should prompt an auto preview of the dataset, for a quick inspection of the first rows, and with some configuration and parsing options, including character encoding (see handout for more info on this topic). OpenRefine automatically detects the character encoding used in your file.
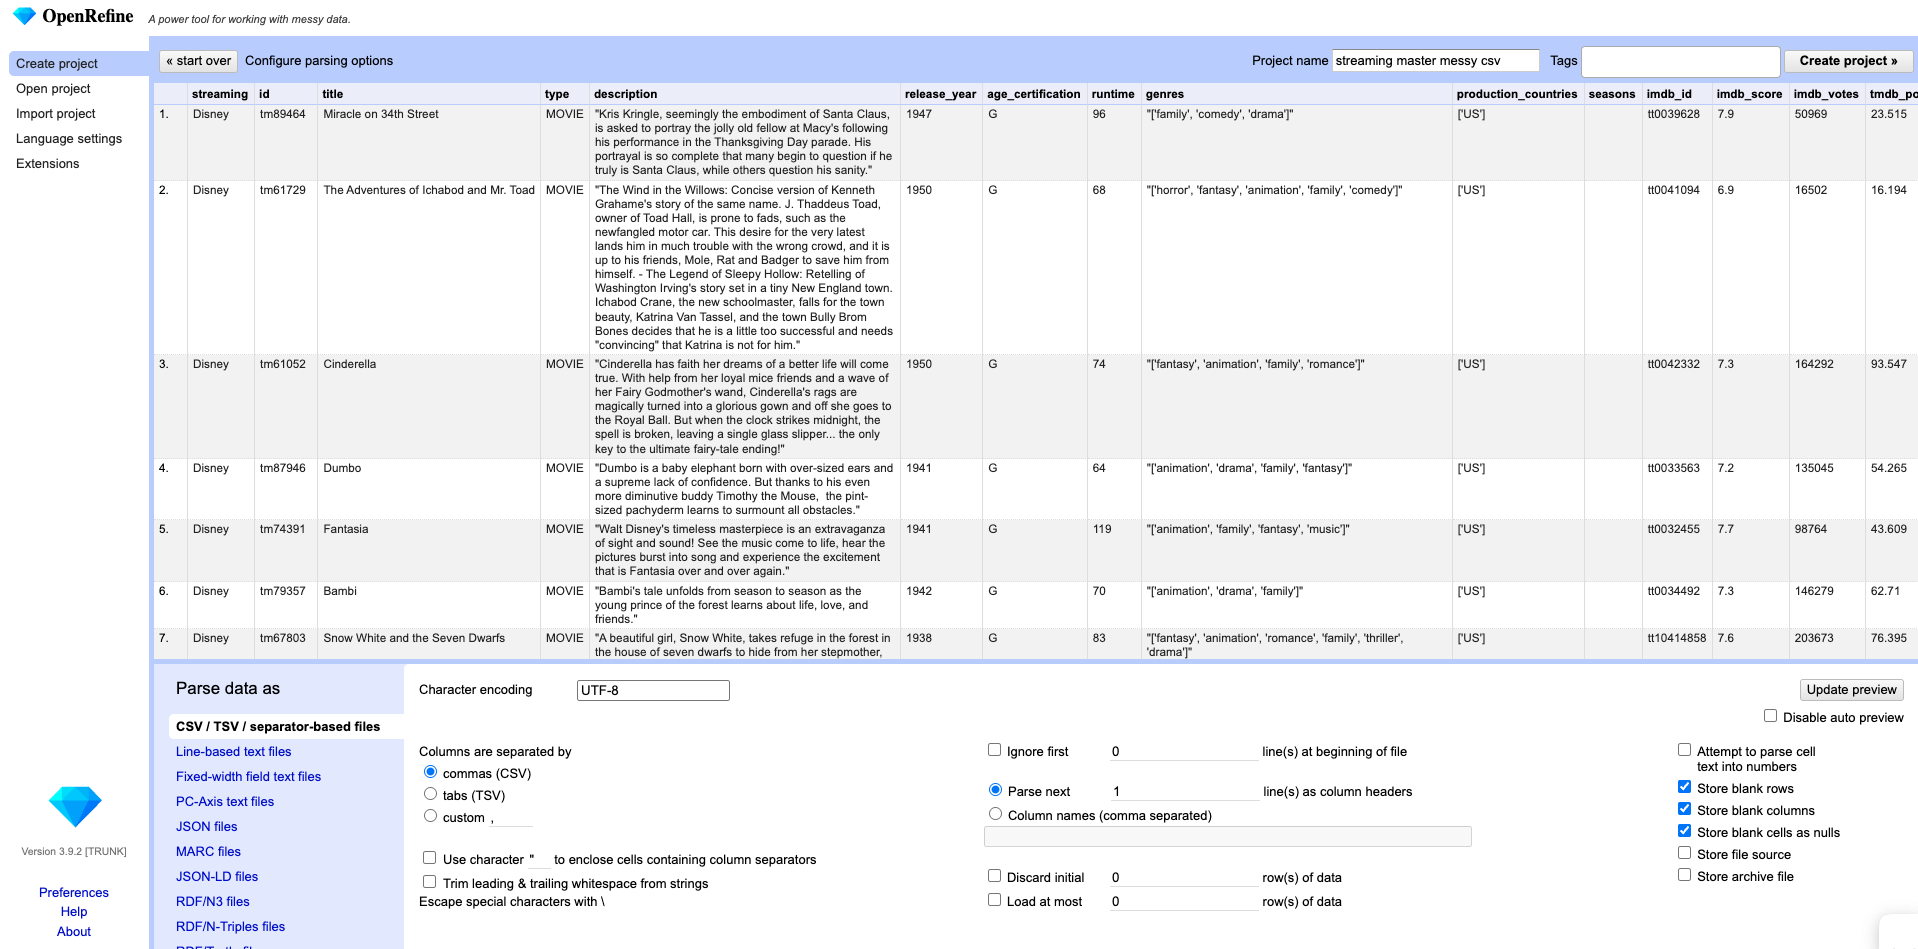
We’ll stick with the default settings for now—they typically work well for most CSV datasets. However, if the data preview doesn’t look quite right, it may be worth adjusting the parsing options to better match your file’s structure.
Unlike spreadsheets, OpenRefine does not store formulas and display the output of those calculations; it only shows the value inside each cell.
Also, keep in mind that OpenRefine does not retain any oririnal formatting from your file. Elements like cell colors, font styles, or background shading will be lost during import. Hyperlinked text will appear as plain text, though OpenRefine will detect any URLs and make them clickable within the project interface.
That said, relying on visual formatting or emphasis—like colors or bold text—to convey important meaning isn’t recommended in data management. These elements aren’t machine-readable and can lead to inconsistencies or misinterpretation during analysis. It’s always better to encode meaning directly in the data using clearly labeled columns or consistent values.
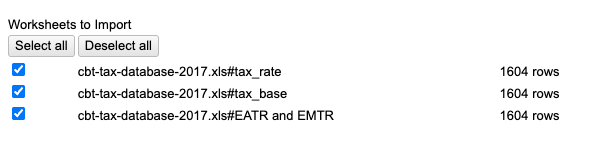
If your spreadsheet includes multiple worksheets, OpenRefine will display each one along with its row count. You’ll need to choose a single worksheet to import—only one can be selected at a time.
In the upper-right corner, you can rename your project and add tags to link it with related projects. Once you’re set, simply click Create Project Now that we’ve created our project, let’s take a step back and explore a few more features. Click the OpenRefine logo on the left-hand side and select Open Project Great! You should see the project we just created. By clicking on About you can edit the project metadata, helping keep everything organized and easy to locate. Experiment yourself.
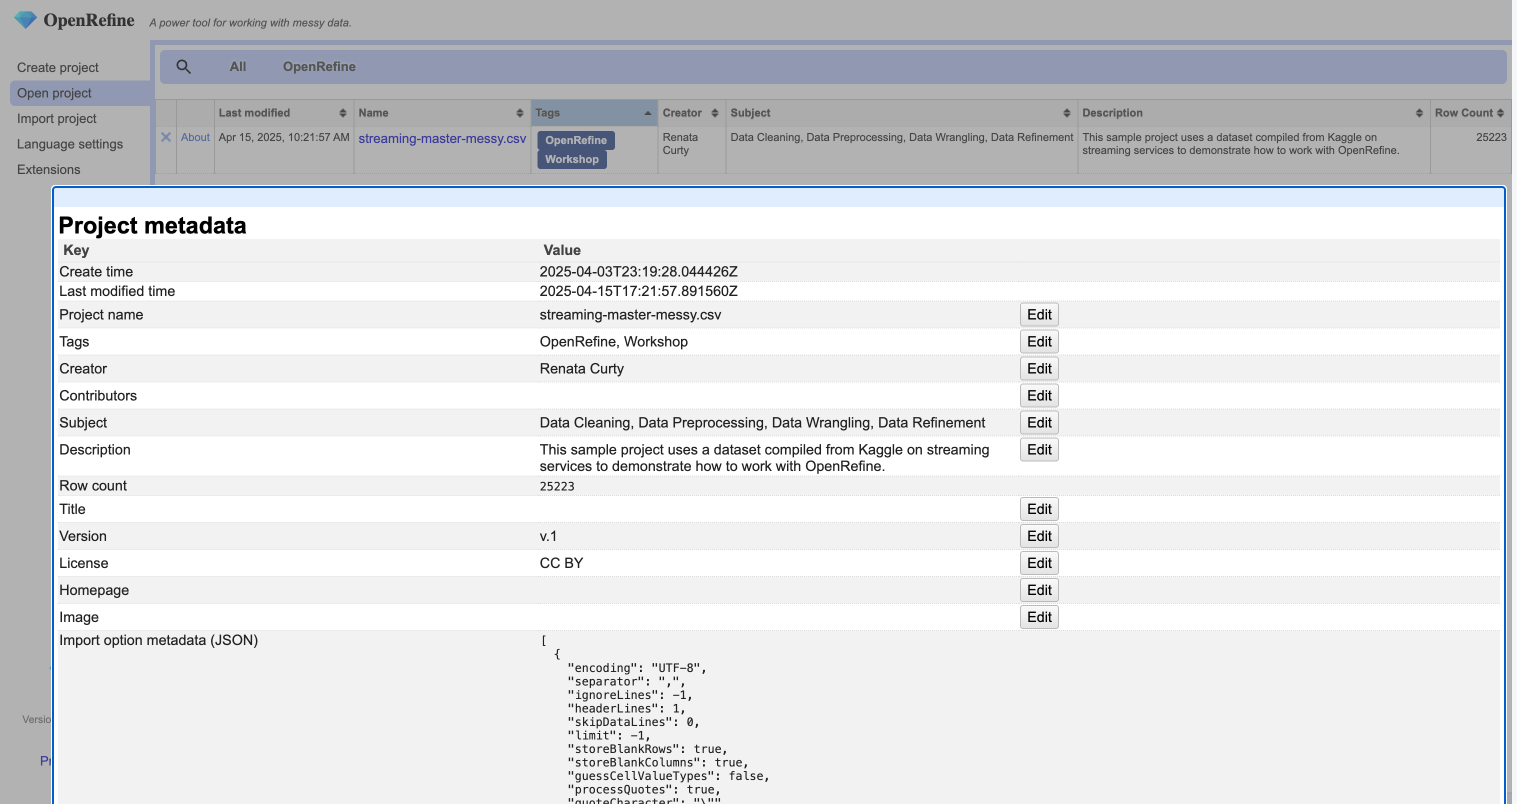
If you scroll down, you’ll see the Project ID assigned to your new project in the metadata panel—nice work! Now that everything’s set up, let’s jump back into the project and explore some of OpenRefine’s powerful features. To return to your project, just click on its name.
Saving Things
OpenRefine automatically records all your actions, which are listed in the Undo/Redo panel we will be exploring more soon. This includes things like flagging and starring rows. However, it does not save facets (which will learn more about), filters, or any visual changes you’ve made—such as the number of visible rows, column sorting, or collapsed columns. A good rule to remember: if it’s not in the Undo/Redo panel, it won’t be saved when you exit the project.
By default, OpenRefine autosaves your project every five minutes. If you’d like you can adjust this setting using the command line and following the instructions laid out here.
While you can’t save general view settings, you can save and share your current facets and filters. To do this, click Permalink. This generates a new URL that reloads the project with your current facets and filters, including specific settings (like sorting by count instead of name). Copy and save that URL to return to the same filtered view later.
Where are Projects Stored?
All of your raw project files are stored in your OpenRefine work directory. Each file is named using the unique Project ID assigned by OpenRefine. You can find this ID by going to the Open Project screen and clicking the About link next to the project. Let’s take a moment to check where your files are.
OpenRefine stores data in two places:
Program files in the program directory, wherever you’ve chose to installed it
Project files in what we call the workspace directory
You can access the workspace directory by:
Launch OpenRefine and click Open Project in the sidebar
At the bottom of the screen, click Browse workspace directory
A file-explorer or finder window will open in your workspace
We will keep the default configuration for now, but you can customize the desired location by following these instructions.
What Happens to the Original Dataset?
OpenRefine gives researchers piece of mind by following a key best practice in data management: always preserve an untouched version of your original dataset. Why? Because having an unaltered copy ensures you can always return to the source if something goes wrong, verify your changes, or reprocess the data with a different approach—without risking data loss or corruption.